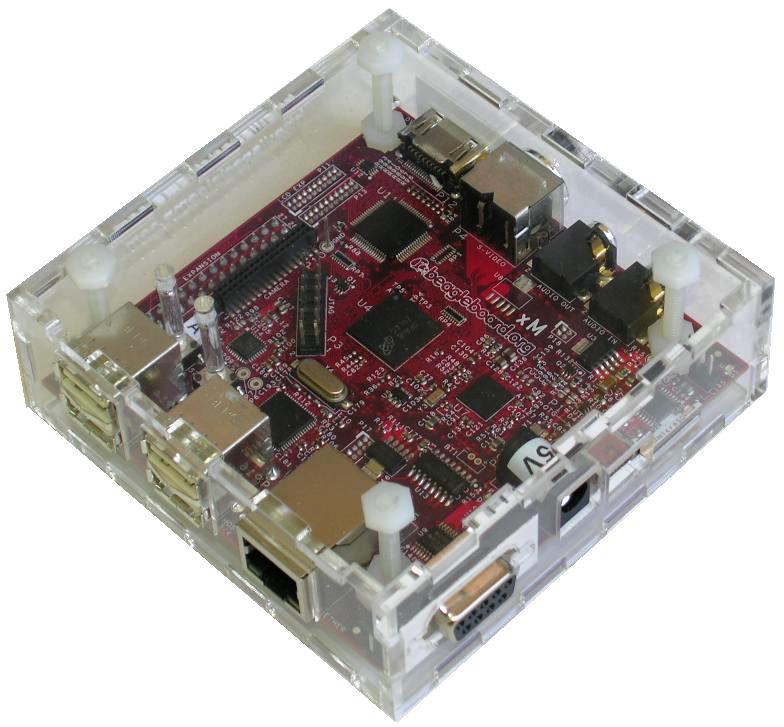
If you're reading this post than you are probably where I was a couple of months ago. You wanted to jump on the bandwagon of the single board, SOC craze and ran out and bought a Beagleboard XM (rev C in this case). You did this not because you're a developer or a potential product manufacturer but you thought the idea of a 1Ghz computer that fits into the palm of your hand is just plain AWESOME. You got it in the mail, opened it up, plugged it into your TV, and played with the demo image for 5 full minutes before going "ok, what else can I do with this?"
Then you started researching (and perhaps started secretly wishing you bought a Pandaboard or RasPi due to the overwhelming amount of prebuilt software/support available). You spend hours sifting through Google Groups, forums, and blogs only to find that there are hardly any detailed 'how-tos'. Or even worse, only brief glimpses of people who are facing the exact same issues you are or the occasional, "I HAVE AN ISSUE"........."NEVERMIND. I FIXED IT" with nothing explanation as to how....

So I decided that I could either be part of the problem, or part of the solution. These posts won't contain issues or 'work in progress'. These will be detailed how-to's on how myself and my partner in crime plan on turning a Beagleboard XM rev C into a "Swiss Army Knife" of portable computing. Each 'phase' will basically be it's own 'sdcard' to swap out at will depending on what you want to accomplish.
Upcoming Projects:
Phase 1 - XBMC
- Phase 1.5 - XBMC - CarPC
- Phase 2 - Full Android System (rooted, google apps, etc)
- Phase 3 - Wireless Webcam Monitoring System (mjpegstreamer, lighttp)
- Phase 4 - Headless Music Server (MPD, lighttp)
- Phase 5 - OpenWRT Wireless Router
Phase 1 - XBMC
The first time I saw this little board my mind immediately jumped to using this thing as a replacement for my CarPC. While that process is ongoing, the majority of my time was spend just getting Angstrom, SGX, and XBMC to play nicely. Here is EXACTLY how to get XBMC running on your Beagleboard XM rev C (as long as you already have some basic knowledge of Linux).
(continued after the break)
Step 1 - Setup your Micro SD Card (minimum 4gb...maybe 2gb)
Using a Linux OS (ubuntu/debian/etc), plug in your Micro SD Card and check 'dmesg' to determine its location. For the purposes of this how-to, we're going to use '/dev/sdb'
Fire up 'gparted', go to '/dev/sdb/' (unmount the partition(s) if necessary), delete the existing parition(s), and setup two partitions as follows:
Partition 1 - Primary - 100mb - fat32 - set boot/lba flag - Name='boot'
Partition 2 - Primary - remaining space - ext3 - Name='rootfs'
Step 2 - Get the files you'll need
Download the following files:
Recently prebuilt Angstrom rootfs (Gnome) this is the only version I could get SGX to work on 'out of the box'
MLO
u-boot.img
Ethernet Kernel Module (trust me)
Step 3 - Create uEnv.txt with the following:
Step 4 - Copy files to the 'boot' partition IN THIS ORDER:
#1 - MLO
#2 - u-boot.img
#3 - uEnv.txt
Step 5 - Extract the tar.gz to 'rootfs' partition
Step 6 - Copy ethernet kernel module to home directory on the rootfs partition
Step 7 - SYNC AND EJECT SAFELY
You just did alot of stuff to that card, make sure it's complete before you unplug it.
Step 8 - Insert SD and Boot up the Beagleboard (takes about 20-30 minutes the first time...be patient)
After the initial boot is complete, login as 'root' (no password)
Reboot (just to be safe after first initialization) and log back in
Make sure you have ethernet connectivity and execute:
Reboot
Reboot again (if any modules failed to load...it happens after an upgrade)
If you did everything perfectly, you're now on kernel 3.2.28 (as of Aug 2012) and your ethernet no longer works. So you don't have internet connectivity to re-download the package........aren't you glad you copied over that ipk now?
Install everything you need to run XBMC:
Reboot
Set volume levels:
Set volume levels of [DAC2 Analog] [DAC2 Digital Fine] [DAC2 Digital Course] [Headset]
Unmute [HeadsetL Mixer AudioL2][HeadsetL Mixer AudioR2]
Save the volume levels
Reboot
Step 9 - Fire up XBMC!!!
You can login to Gnome by typing
OR you can set gdm to start on boot by executing:
Once gnome starts up open a terminal and execute:
(launching xbmc from the menu doesn't work.........here's why if you want to fix it)
DANCE A JIG!!!
Hello Thomas,
ReplyDeletefirst thing tanks you very much, I found your post really helpful one way or another... The thing is that I'm working with a Beagleboard revC, and doing some testing flashing the NAND, running a complete operative system without a SD card. I've been able to succesfully flash the X-Loader (MLO), bootloader (U-Boot) and kernel (uImage) into the NAND, I also managed to flash the file system (the one you reference above) into the NAND too. The first thing I notice when the board boots, is that gnome doesn't start automatically, the runlevel the console gives me is one "1" (usually a desktop starts at runlevel 5) and some of the commands that usually work under linux doesn't. As you pointed above I type gdm to see if I can get a GUI, the screen goes black like if it were starting the desktop, I also see what seems to be a pointer with some clock in the center of the screen, but then the screen goes back to console and type some message "gdm-binary[612]: WARNING: GdmDisplay: display lasted 1.114502 seconds", then back to the black screen with the mouse several times, after that the console ouput "gdm-binary[612]: WARNING: GdmLocalDisplayFactory: maximum number of X display failures reached: check X server log for errors"
At that point I don't know what else I can do, beacuse I tried to switch to another runlevel typing "init 5" but then the console print "Couldn't find an alternative telinit implementation to spawn." So any help you can provide me would be very appreciated, thank you again, best regards,
Victor
I haven't specifically encountered this issue before, but it would seem to be related to the video driver. Did you perform an upgrade on the base image and did you install xf86-video-omapfb?
DeleteHi Thomas,
ReplyDeletegood job !!!!! It's a long time I was looking for a good post, and now I can see it running the first time on my BB-XM :-)))))
I would report to you an issue regarding plugin, in details when I try to run any add-on it show message "Script failed : xxx.py".
Did you try on your side ?
Regards.
dbemme.
Did you find a solution to this? ... I am running in the same troubles. Chris
ReplyDeleteI have not. My attention has been focused on getting wifi working.
DeleteThank you so much for the Ethernet fix after upgrading! I've been looking for a fix for hours!
ReplyDeleteHi Thomas, thanks for writing this extensive guide. I was wondering if there's any chance of providing a ready to dd image for BB-XM.
ReplyDeleteI certainly will when I have a spare moment. In the meantime, another beagle-champion has the base files available that have the latest kernel, system files, and modules already built-in. It's not a img, but it also gets rid of the ethernet/wifi issues. Technically you could follow his instructions and then just install xbmc per my instructions above: http://blog.sibvisions.com/2012/12/03/pre-built-angstrom-image-for-beagleboard-xm
DeleteHey Thomas,
ReplyDeleteFirst of all thank you very much for this article. You saved me a lot of time and effort.
I am now able to start xbmc, but I can't do much else in there. I keep getting script errors when I try run an add-on or even visit "weather". I enabled debug logging following the instructions at http://wiki.xbmc.org/index.php?title=Log_file/Easy, and found that python imports for urllib2 and csv are failing. Any idea how I can get those installed?
Running "opkg install python-modules" (in additiona to all the steps described in this article) seems to have addressed all the missing python module issues.
DeleteGood luck.
Post updated. Thanks!
Delete